
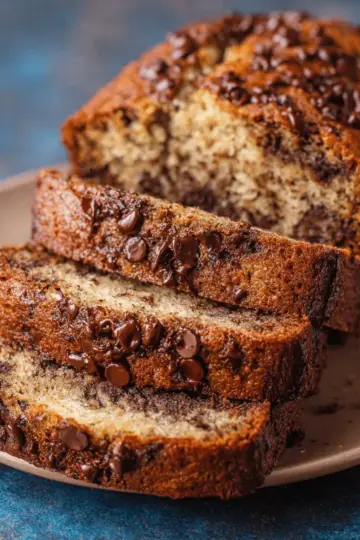
Introduction to Homemade Cream Puffs
The allure of homemade cream puffs
There's something undeniably enchanting about homemade cream puffs. These delightful French pastries boast a light, airy texture, making them a perfect treat for any occasion. Whether you're hosting a dinner party, celebrating a birthday, or just satisfying a sweet craving, cream puffs are bound to impress your guests.
The magic of cream puffs lies in their crispy choux pastry shells, which puff up beautifully in the oven to create a hollow center, ready to be filled with your choice of delicious filling. Whipped cream is just one option, but you can also experiment with pastry cream or even ice cream! The best part? Crafting these delectable desserts at home is easier than you might think.
If you're curious about how to whip up some homemade cream puffs, you're in the right place! This beginner-friendly recipe will guide you through each step, ensuring you achieve the perfect balance between a crispy exterior and creamy interior. Plus, impressing friends and family with your baking skills is just a bonus!
Are you ready to dive into the world of cream puffs? Let’s get started!
Ingredients for Homemade Cream Puffs
Creating homemade cream puffs is a joyous cooking adventure, and having the right ingredients is key to your success! Let's break it down into two essential components: the dough and the filling.
Essential Ingredients for Pâte à Choux
To craft those delightful puff shells, you’ll need:
- Water: 1 ¼ cups (300 ml), divided
- Granulated sugar: 1 teaspoon (4 g)
- Kosher salt: ½ teaspoon (2 g)
- Unsalted butter: ½ cup (114 g), cut into slices
- All-purpose flour: 1 cup (124 g), spooned and leveled
- Large eggs: 4, essential for that airy texture
- Powdered sugar: ¼ cup (12 g) for a lovely dusting
These ingredients come together to create a beautifully airy pastry that's crispy on the outside.
Ingredients for the Whipped Cream Filling
For a luscious filling that pairs perfectly with the choux pastry, gather:
- Heavy whipping cream: 2 cups (480 ml)
- Powdered sugar or granulated sugar: ½ cup (24 g)
- Pure vanilla extract: 1 teaspoon (5 ml) for that aromatic touch
The combination of these simple ingredients results in a rich, velvety cream that complements the lightness of the pastry.
Ready to impress your friends with these delightful treats? For more tips on techniques and variations, check out our guides on modern pastry making or whipped cream perfection. Enjoy your baking!
Step-by-step Preparation of Homemade Cream Puffs
Step 1: Gather and prepare your ingredients
To start your journey in creating homemade cream puffs, it’s essential to gather everything you need. You’ll require:
- 1 ¼ cup water
- 1 teaspoon granulated sugar
- ½ teaspoon kosher salt
- ½ cup unsalted butter (cut into slices)
- 1 cup all-purpose flour
- 4 large eggs
- Powdered sugar for dusting
Also, don’t forget the ingredients for your whipped cream filling:
- 2 cups heavy cream
- ½ cup powdered sugar
- 1 teaspoon pure vanilla extract
Make sure you have your special equipment ready, including a stand mixer, cooling rack, and pastry bags with tips (plain and star types). Once everything is set, you can proceed.
Step 2: Make the pâte à choux dough
In a heavy-bottomed saucepan, combine 1 cup of water, sugar, salt, and butter. Bring this mixture to a boil over medium-high heat until the butter fully melts—this should take about 2 minutes. Once melted, remove from heat and quickly stir in the flour. This creates a sticky dough.
Step 3: Cool the dough properly
After mixing the flour in, it’s crucial to cool your dough to prevent the eggs from cooking. Transfer the dough to the bowl of your stand mixer and mix on low speed for about 2-3 minutes until it reaches around 130°F (54ºC). This will allow for a smoother incorporation of the eggs.
Step 4: Add eggs and mix to the right consistency
Add the eggs one at a time, mixing on medium-low speed until each is fully integrated. This step is vital for achieving the correct texture of your homemade cream puffs—the dough should be shiny and firm but still slightly sticky.
Step 5: Pipe the dough onto the baking sheets
Prepare your piping bag by fitting it with a large plain tip. Pipe 2-inch circular dollops onto lined baking sheets, ensuring they are placed at least 2 inches apart. This spacing allows your cream puffs to expand beautifully in the oven.
Step 6: Apply the egg wash
To give your cream puffs that golden-brown finish, whisk together an egg with a tablespoon of water (or milk) and brush it over the tops of the dough mounds. This egg wash is a critical step for both flavor and visual appeal.
Step 7: Bake the cream puffs with patience
Pop your trays in the oven and maintain the temperature carefully! Bake at 425°F (218ºC) for the first ten minutes, then lower to 375°F (191ºC) for another ten. Gradually decrease the temperature until they are completely baked and are a delightful golden brown.
Step 8: Prepare the whipped cream filling
To make the filling, whip together heavy cream, powdered sugar, and vanilla extract on medium speed. Aim for stiff peaks—this is what will fill your puffs with that airy, creamy texture that everyone loves.
Step 9: Assemble the cream puffs
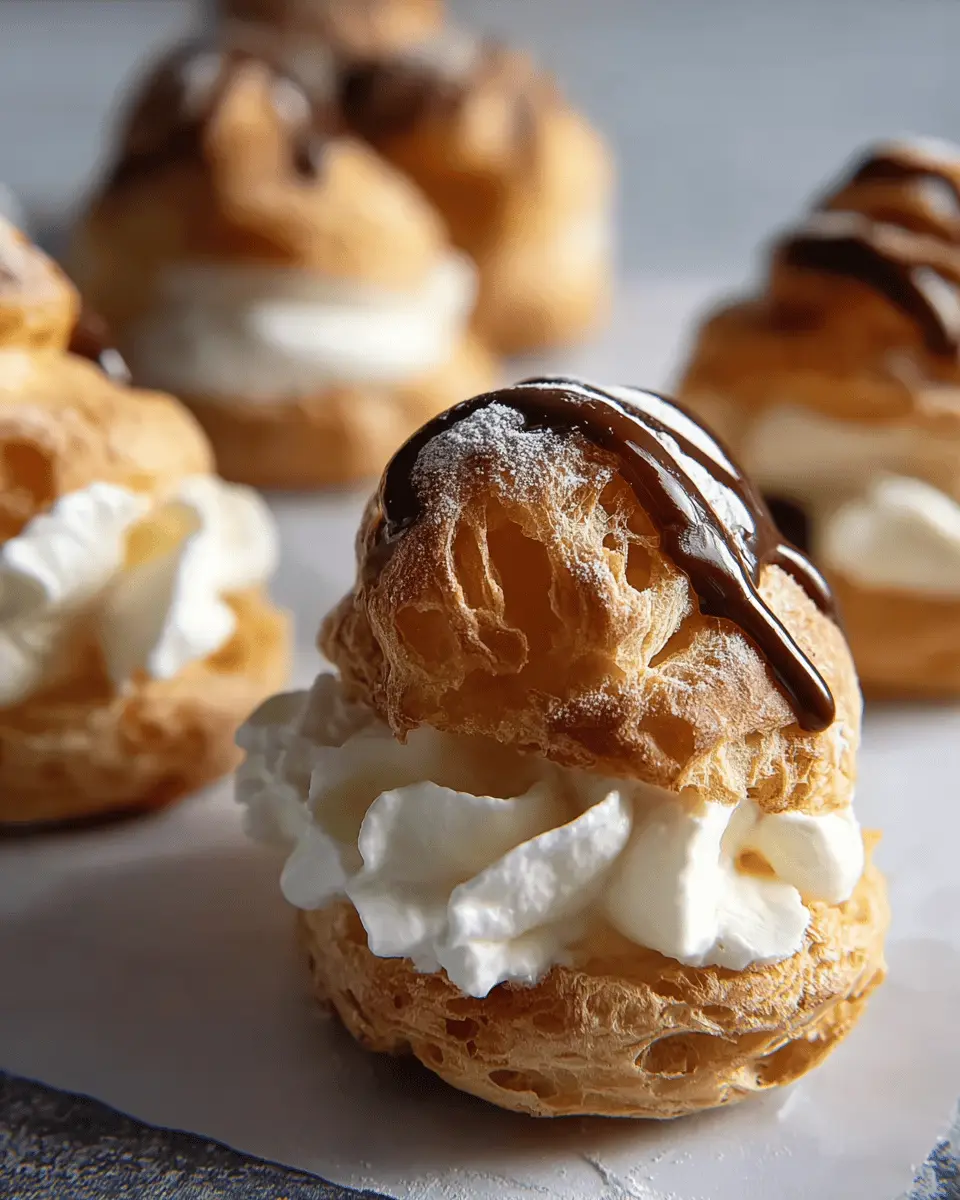
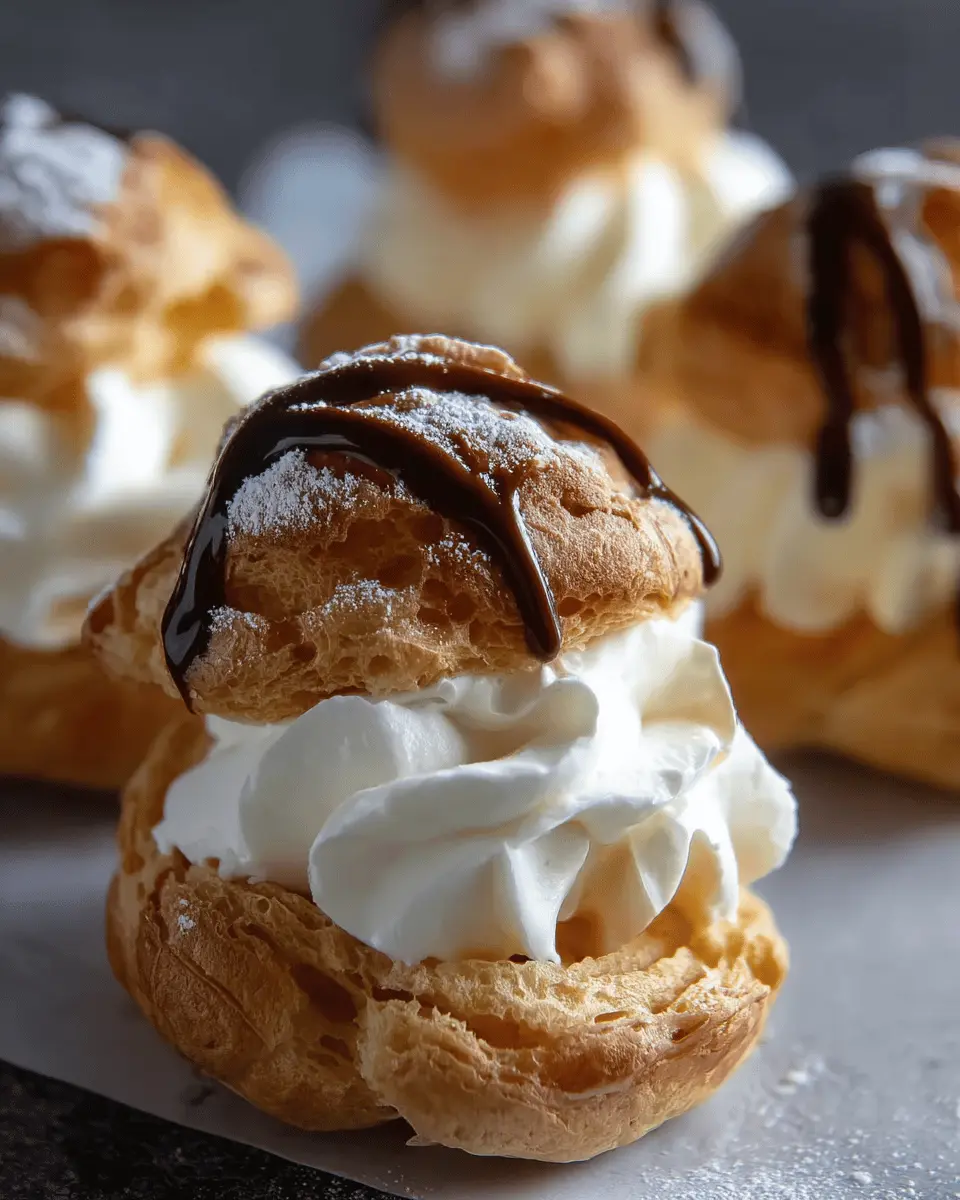
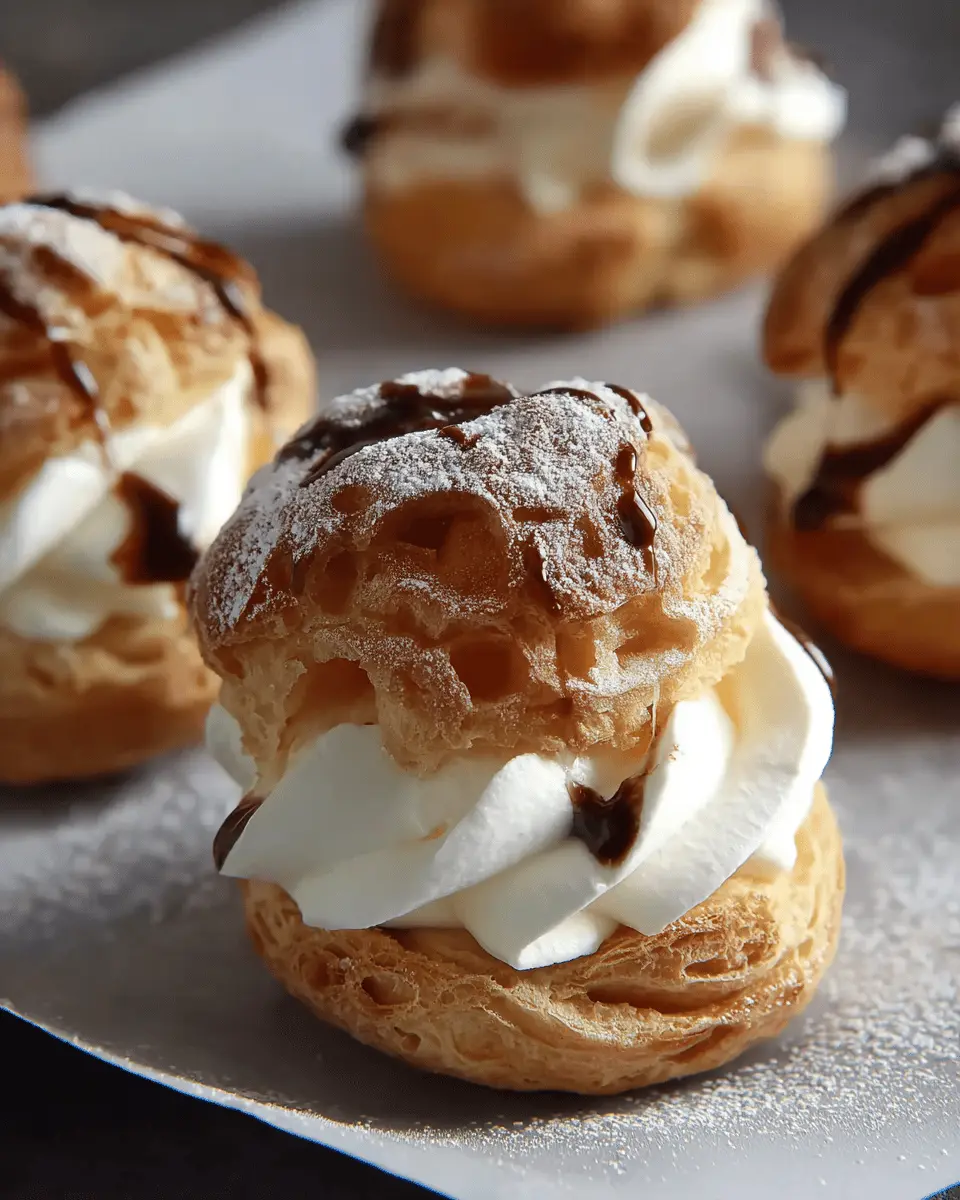
Finally, it's time to bring it all together! Cut the cooled cream puff shells in half, pipe the whipped cream generously into the bottom, and place the tops back on. Dust them with powdered sugar for that extra touch.
Enjoy your freshly made homemade cream puffs! If you're looking for tips on variations or cream puff history, you might want to explore this article. Happy baking!
Variations on Homemade Cream Puffs
Flavored Whipped Cream Options
Elevate your homemade cream puffs by infusing the whipped cream with delightful flavors! Consider adding a splash of almond extract or a teaspoon of melted chocolate for a delicious twist. For a refreshing note, mix in some citrus zest—think lemon or orange—to brighten up your filling. Don’t forget about spices, too! A pinch of cinnamon or nutmeg can bring a whole new dimension to your cream.
Adding Fruits or Sauces for Filling
Take your cream puffs to the next level by filling them with fresh fruits or decadent sauces. Sliced strawberries, raspberries, or seasonal fruits like peaches add a gorgeous burst of color and flavor. You could also consider drizzling warm chocolate sauce or caramel inside for a rich and indulgent experience. Explore different combinations and find your favorite that truly represents your taste!
Cooking Tips and Notes for Homemade Cream Puffs
Common Pitfalls to Avoid
Making homemade cream puffs can be simple, but avoiding a few common mistakes is key. First, make sure not to open the oven door while baking! This can cause your puffs to collapse. Another pitfall is not allowing the dough to cool before adding the eggs; this could lead to scrambled eggs and a ruined texture. Also, don’t skip the gradual baking process—it’s vital for achieving that light, airy texture.
Best Storage Practices for Cream Puffs
To keep your homemade cream puffs fresh, it's best to fill them just before serving. Unfilled baked shells can be stored at room temperature in an airtight container for up to five days, or they can be frozen for up to a month. If they lose their crispness, reheat them at 300°F (149°C) for 5-10 minutes to revive that delightful crunch. When filled, store them uncovered in the fridge for up to three days for the best flavor.
For more baking insights and tips, check out this baking resource or dive into the Nerdy Baker for creative recipe ideas!
Serving Suggestions for Homemade Cream Puffs
Creative Plating Ideas
Transform your homemade cream puffs into an eye-catching dessert centerpiece! Arrange them on a beautiful cake stand or a decorative platter, and consider dusting the tower with powdered sugar for that extra flair. To play with colors, you can add fresh berries or edible flowers around the puffs. Drizzling chocolate or caramel sauce adds a tantalizing touch and invites guests to dig in!
Pairing with Drinks and Desserts
To elevate your dessert experience, serve your cream puffs with a side of rich coffee or a refreshing herbal tea. The contrast of flavors will delight your palate. Alternatively, consider pairing with light desserts like sorbet or macarons to create a delightful assortment. Your guests will appreciate the thoughtfulness that goes into a curated dessert table! For other dessert inspirations, check out this guide on dessert pairings.
Time Breakdown for Homemade Cream Puffs
When planning to create these delightful homemade cream puffs, getting the timing right is essential for success. Here’s a quick overview of what to expect:
Preparation Time
Set aside about 30 minutes for prepping the ingredients and mixing that beautifully airy dough.
Cooking Time
The baking process takes 1 hour and 15 minutes, allowing each puff to rise perfectly golden and delicious.
Total Time
In total, you’re looking at 1 hour and 45 minutes from start to finish, yielding 16 delightful cream puffs that are sure to impress your friends and family.
Whether you're eager to whip up this classic French dessert for a special occasion or just a weekend treat, keeping track of your time will ensure everything turns out just right. Happy baking!
For more tips on mastering this recipe, check out resources like Serious Eats or BBC Good Food.
Nutritional Facts for Homemade Cream Puffs
When indulging in homemade cream puffs, it’s good to know what you're treating yourself to. Each cream puff contains approximately:
Calories
- 116 kcal per puff, making them a delightful but manageable dessert choice.
Protein
- With around 3 grams of protein, these treats help satisfy hunger without overwhelming your diet.
Sugar Content
- Each cream puff has about 4 grams of sugar, allowing for a sweet experience while keeping sugar levels moderate.
For more detailed nutritional benefits, consider checking resources like the USDA Food Data Central for comprehensive insights into ingredients. Enjoy your baking adventure with these homemade cream puffs!
FAQs About Homemade Cream Puffs
How do I achieve the perfect choux pastry?
To create the perfect choux pastry, the key is in your technique. Start by ensuring all your ingredients are measured precisely. When mixing your flour with the butter and water, make sure to stir vigorously until it pulls away from the pan, creating a smooth and glossy texture. It’s also crucial to gradually incorporate the eggs; each one should fully mix in before adding the next. This helps create that airy structure essential for homemade cream puffs.
Can I make cream puffs ahead of time?
Absolutely! You can prepare the shells a day in advance. Just keep them in an airtight container at room temperature. However, for the best flavor and texture, it’s ideal to fill them with whipped cream just before serving. Planning a little ahead will save you some stress during dessert time!
What’s the best way to store leftover cream puffs?
To store leftover cream puffs, place them in an airtight container and keep them in the fridge. They’ll last for up to three days, but for the crispiest experience, enjoy them the same day they’re made. If they lose their crispness, a quick reheat in the oven can work wonders!
For more tips on storage and serving, check out resources like the Joy of Baking for expert advice.
Conclusion on Homemade Cream Puffs
Embracing the Joy of Making Cream Puffs at Home
Creating homemade cream puffs is an enjoyable and rewarding experience. With just a few simple ingredients, you can impress friends and family with airy choux pastry filled with luscious whipped cream. So gather your ingredients and start piping — these delightful pastries are sure to bring sweet joy to your day!

Homemade Cream Puffs: The Best Indulgent Treat for Everyone
Equipment
- Stand Mixer
- Cooling Rack
- Pastry Bag
- Plain Pastry Tip
- Star Pastry Tip
Ingredients
Pâte à Choux
- 1 ¼ cups water, divided
- 1 teaspoon granulated sugar
- ½ teaspoon kosher salt
- ½ cup unsalted butter, cut into 8 slices
- 1 cup all-purpose flour, spoon and leveled
- 4 large eggs
- ¼ cup powdered sugar, for dusting
Egg Wash
- 1 large egg
- 1 tablespoon water, or milk
Whipped Cream (4 cups)
- 2 cups heavy whipping cream or heavy cream
- ½ cup powdered sugar or granulated sugar
- 1 teaspoon pure vanilla extract
Instructions
Instructions
- Preheat the Oven - Set the oven racks to upper-middle and lower-middle positions. Preheat to 425°F (218ºC). Line two sheet pans with parchment paper and set them aside.
- Make the Dough - In a large heavy-bottomed saucepan, add 1 cup of water, sugar, salt, and butter. Bring to a boil over medium-high heat and stir until the butter fully melts, about 2 minutes.
- Turn off the heat and immediately add the flour. Vigorously stir with a large spoon (non-metal) until the flour is incorporated. Increase the heat to medium, and constantly stir until it clumps together, about 4 to 5 minutes.
- The dough should look relatively dry and just begin to leave a film on the saucepan.
- Cool the Dough - Transfer the dough to a bowl of a stand mixer fitted with a paddle. Slowly stir on low speed (setting 2) to cool to 130°F (54ºC) or just below, about 2 to 3 minutes.
- Add the Eggs in Stages - Add eggs one at a time, mixing on medium-low speed (setting 4) until each egg is fully incorporated, about 30 to 45 seconds per egg.
- Once 3 eggs are added, check to see if the dough pulls away from the bowl's sides in thick threads, it will not clear the bowl.
- It should be shiny but firm and not runny, so it’s easy to control when piped. If it’s still too thick, add the fourth egg and mix for 45 seconds.
- Piping the Dough - Add a large plain tip to a piping bag. Lightly grease the inside of the pastry bag with cooking spray.
- Add the dough to the pastry bag. Pipe onto the sheet pan, creating a 2-inch circular ball.
- Pipe at least 2 inches apart from each other. They will expand to about 3 inches after baking.
- Brush on Egg Wash - In a small bowl, whisk together one egg and 1 tablespoon of water. Brush the tops and sides of each dough ball with the egg wash.
- Gradual Baking Process - Place the sheet trays in the upper-middle and lower-middle positions. Bake for 10 minutes at each temperature setting: 425°F (218ºC), 375°F (191ºC), 325°F (163ºC), 275°F (135ºC), 225°F (107ºC), 200°F (93ºC).
- Do not open the oven door! It will take about 60 to 70 minutes of total baking time.
- To check for doneness, break open one of the pastries. It should be as dry and feel light in weight.
- If needed, continue to bake the pâte à choux at 200°F (93ºC). Transfer shells to a cooling rack. Cool completely and reserve until ready to fill.
- Make the Whipped Cream - In a stand mixer fitted with the whisk attachment, add heavy cream, powdered sugar, and 1 teaspoon vanilla extract to the bowl.
- Whip on medium-low speed (setting 4) until the cream is frothy with bubbles on the surface, about 1 minute.
- Increase the speed to medium-high (setting 8), and whip until smooth, stiff peaks form, about 2 minutes.
- If needed, continue to whip in 5-second intervals. Do not overwhip, or the cream will become curdled.
- Piping the Cream - Working in batches, add the whipped cream to a pastry bag fitted with a large star tip. Use a serrated knife to cut the shells in half to create a top and bottom.
- Evenly pipe the whipped cream into the pastry bottoms. Gently place the lids on top of the cream.
- Top with Sugar - Sprinkle powdered sugar on top of each cream puff. Serve immediately, or refrigerate, uncovered, if not eating within one hour.

Leave a Reply