
Introduction to Kimchi Recipe
Kimchi, a staple of Korean cuisine, is much more than just a side dish—it's a vibrant celebration of flavors and fermentation. Why make your own kimchi, you ask? For starters, crafting this ultra-healthy dish at home allows you to tailor it to your taste. Whether you enjoy it fiery or subtly spicy, you can adjust the ingredients to create your perfect kimchi recipe.
Moreover, homemade kimchi is a vivid reminder of the fermentation process, a traditional technique that not only enhances flavors but also boosts nutrient absorption. According to a study published by the American Society for Nutrition, fermented foods can play a key role in supporting gut health. By diving into this recipe, you're not just whipping up a dish; you're embracing a sustainable, flavorful lifestyle.
Making kimchi is also a fun and rewarding project that brings a touch of Korean culture to your kitchen. Maybe you'll find yourself experimenting with unique ingredients, such as different varieties of cabbage or unexpected fruits. Ready to dive in? Let’s explore this spicy kimchi recipe that’s bound to become a household favorite! For a deeper understanding of fermentation, check out resources on sites like Food Safety and Inspection Service.

Ingredients for Kimchi Recipe
Essential ingredients for authentic kimchi
To create a truly authentic kimchi recipe, you'll need a few key ingredients that lay the groundwork for that vibrant flavor profile we all love. Here’s what you need:
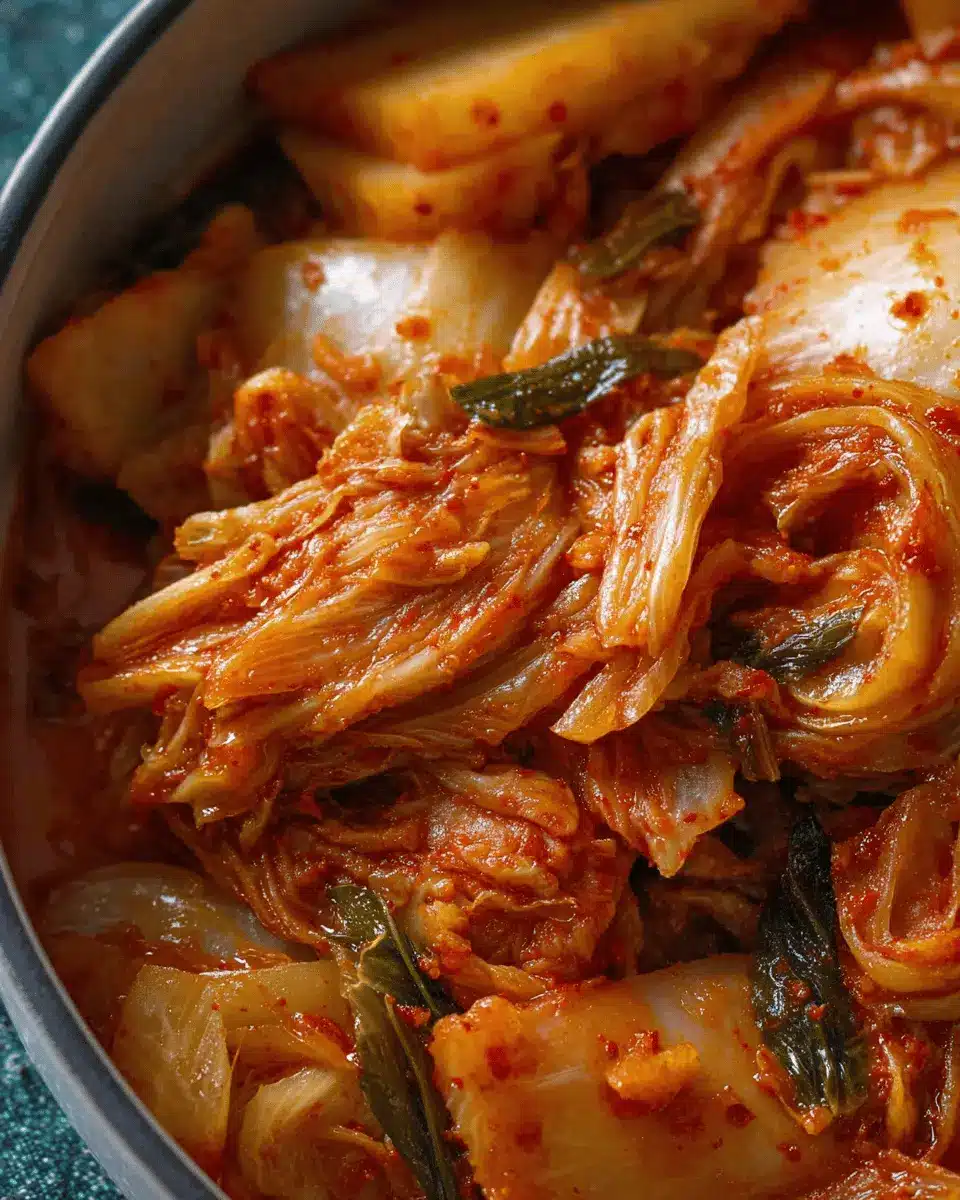
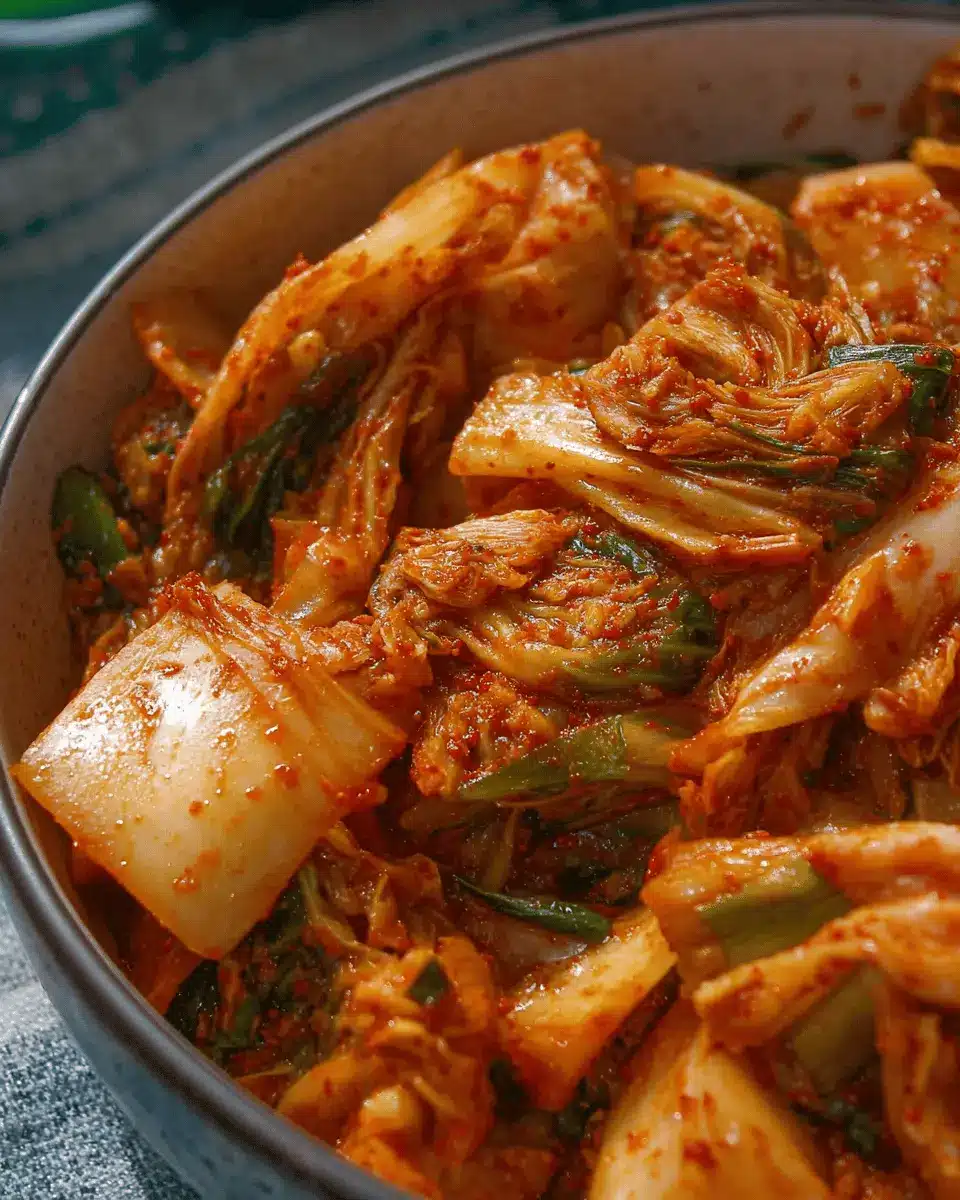
- Napa Cabbage: The star of the show! Use about 3 pounds for a perfect texture.
- Kosher or Sea Salt: This is crucial for brining the cabbage—½ cup will do the trick.
- Gochugaru: These Korean chili flakes bring that signature spice; aim for 1 cup.
- Fish Sauce: Adds a deep umami flavor; you’ll need ½ cup.
- Garlic and Ginger: For aroma and zest, include 6 cloves of garlic and 2 tablespoons of fresh ginger.
Optional ingredients for personalization
Once you have the essentials down, feel free to mix in some personal touches:
- Vegetable Variations: Consider adding sliced radish, carrots, or even Asian pear for a touch of sweetness.
- Umami Boosters: Experiment with miso paste or salted shrimp to enhance the flavor.
- Spice It Up: If you love heat, don’t hesitate to add more gochugaru!
By selecting these ingredients, you’ll be on your way to crafting a deliciously fermented dish. For more details on kimchi variations, check out Korean Bapsang's guide.
Preparing Kimchi: Step-by-Step
Making kimchi at home might seem daunting, but it’s actually a straightforward and rewarding process. Let’s break it down into easy steps, so you can enjoy your very own batch of this beloved Korean dish.
Make the Cabbage Brine
To kick off your kimchi recipe, you’ll first need to create a brine solution. In a large bowl, whisk together:
- 2 quarts of unchlorinated water (filtered or bottled works best)
- ½ cup of kosher or sea salt
Once combined, this brine will prepare the cabbage for fermentation.
Brine the Cabbage
Next, slice off the root end of 1 head of Napa cabbage (about 3 pounds) and quarter it. Submerge the cabbage quarters in the brine you just made, using a plate or weights to ensure they’re fully submerged. Let it sit at room temperature for 8–12 hours. This step is vital, as it helps to soften the cabbage and enhances its flavor.
After draining the brine, rinse the cabbage to remove excess salt and squeeze out any water content. If you prefer smaller pieces, you can chop the cabbage into 1-inch segments.
Prepare the Kimchi Mixture
While your cabbage is brining, prepare the flavorful mixture that will define your kimchi. In a bowl, combine:
- 1 carrot (sliced into matchsticks)
- 1 bunch of scallions (cut into ½ inch pieces)
- 1 small daikon radish (sliced into matchsticks)
- ½ Asian pear (sliced into matchsticks)
- 6 garlic cloves (chopped)
- 2 tablespoons grated fresh ginger
This colorful medley will add both texture and flavor, creating a feast for your senses!
Combine the Ingredients
Now, let’s bring it all together! In a saucepan, combine 3 tablespoons of glutinous rice flour with 1 cup of water. Simmer for a few minutes until it forms a smooth paste. Remove from heat, and stir in 1 cup of gochugaru (Korean chili flakes), ½ cup of fish sauce, and any optional umami-enhancers like salted shrimp or miso paste.
Pour this mixture over the cabbage and vegetables, using your hands (yes, get in there!) to thoroughly coat everything. Don't shy away from getting a bit messy!
Pack and Seal the Kimchi
Transfer your kimchi mixture into clean jars or a fermentation crock. Press down firmly to remove air pockets, and ensure the mixture is submerged in its own liquid. Seal the jars with an airlock lid or a loosened two-piece lid to allow gases to escape during fermentation.
Ferment the Kimchi
Fermentation can be both an art and a science! Store your packed kimchi in a cool, dark place for 1–3 days. Check daily, pressing down if needed to keep the vegetables submerged. Once it reaches your desired level of tanginess, transfer it to the fridge. Letting it rest for a week allows those vibrant flavors to meld beautifully.
Now you’re ready to dive into the world of homemade kimchi! For expert tips and variations, you can check out this article for inspiration. Enjoy your delicious creation!
Variations on Kimchi Recipe
Spicy Variations with Extra Heat
If you're looking to amp up the heat in your kimchi recipe, try adding extra gochugaru or even incorporating fresh chili peppers. Varieties like Thai bird’s eye chilies will bring a fiery punch. For a unique twist, mix in a spoonful of gochujang, a spicy fermented soybean paste, to deepen the flavor profile. These subtle changes elevate your creation, giving it a fiercer kick that spicy food lovers will appreciate.
Fruity Twists with Different Fruits
For a surprising and refreshing take, consider adding fruits like mango, pineapple, or apple to your kimchi recipe. These fruits not only add a sweet contrast to the savory spices but also enhance the overall complexity of flavors. For instance, adding chunks of ripe mango can provide a tropical flair, while a splash of citrus can brighten the palate. Experiment with different combinations to find your perfect blend!
Cooking Tips and Notes for Kimchi
Understanding Fermentation Times
Fermentation is where the magic happens in your kimchi recipe. Don’t rush it! The optimal time can vary based on your kitchen's temperature. On average, you might ferment for 1-3 days at room temperature. The longer it ferments, the tangier it becomes—this can be an exciting journey of flavors!
Tips for Monitoring Flavor Changes
Check your kimchi daily by tasting it. Each day, the flavors will shift dramatically as it ferments. If you prefer a milder flavor, transfer it to the fridge after a day or two. For added depth, allow it to sit a bit longer before chilling. If you're curious to learn more about fermentation, consider checking out resources like The Fermentation Adventure for tips and insights.
Serving Suggestions for Kimchi
Kimchi with rice and protein
One of the simplest yet most delicious ways to enjoy your kimchi recipe is to serve it alongside a bowl of steaming rice. Add some grilled chicken ham, turkey bacon, or even tofu for a wonderful protein boost. The contrast of flavors will uplift your meal—think spicy, tangy kimchi complementing the comforting, soft rice. You can also stir-fry these elements together for a fusion delight!
Incorporating kimchi in everyday meals
Don't limit kimchi to just side dishes; it can elevate any meal. Toss a spoonful into soups, salads, or omelets for an unexpected pop of flavor. Try it in tacos or as a topping on burgers for a creative twist. For a quick snack, consider mixing kimchi with cream cheese and spreading it on crackers. The possibilities are endless! For more inspiration, check out this guide to using kimchi in diverse dishes.
Time Breakdown for Kimchi
Preparation Time
You'll need about 30 minutes to prep your ingredients and get everything ready for your delicious kimchi recipe. Don’t rush; take your time to chop and mix the ingredients just right!
Fermentation Time
Fermentation is where the magic happens, typically taking between 1 to 3 days at room temperature. This duration allows the flavors to meld and truly develop their tangy taste.
Total Time
From start to finish, expect a total of about 2 days for your kimchi to be ready to enjoy! However, it’s recommended to store it in the fridge for another week to enhance the flavors even further. The wait is worth it!
Nutritional Facts for Kimchi
Calories per serving
Each serving of this flavorful kimchi recipe packs approximately 75 calories. With its low-calorie content, it's a great addition to any meal without overwhelming your daily intake.
Health benefits of kimchi
Kimchi is not just delicious; it's a powerhouse of probiotics, which can support gut health and boost your immune system. The fermentation process enhances nutrient absorption and can even aid in digestion. By incorporating kimchi into your diet, you're adding a rich source of antioxidants and vitamins!
Key nutrients in kimchi
This vibrant dish is loaded with essential nutrients, including:
- Fiber: Aiding in digestion and promoting fullness
- Vitamins A and C: Contributing to overall health and vitality
- Minerals like calcium and iron: Supporting bone health and energy levels
For more insights on the benefits of fermented foods, check out resources from the Harvard T.H. Chan School of Public Health that delve deeper into nutrition.
FAQs about Kimchi Recipe
Can I store kimchi long-term?
Absolutely! Homemade kimchi is known for its longevity. When stored in the refrigerator, it can last for 6 to 8 months or even longer. Just make sure it is kept in an airtight container; the cooling temperature slows fermentation but still allows flavors to develop.
How do I adjust the spice level?
If you prefer a milder kimchi recipe, you can easily lighten the heat. Simply reduce the amount of gochugaru (Korean chili flakes) you use. Alternatively, add diced bell peppers for sweetness or more sugar to balance the spice. Want more heat? Add extra gochugaru or a splash of hot pepper sauce during mixing.
What can I use instead of fish sauce?
If you’re looking for substitutes in your kimchi recipe, consider using soy sauce or tamari for a vegan option. Miso paste can also add umami flavor without fish. For a unique twist, a splash of coconut aminos can enhance the taste wonderfully!
For a complete guide on making your own kimchi at home, check out this resource for more tips and variations.
Conclusion on Kimchi Recipe
Making your own kimchi recipe at home is not only rewarding but also allows for customization to suit your taste! With simple ingredients and a bit of patience, you'll have a delicious, probiotic-rich dish ready to elevate any meal. Give it a try and let your culinary creativity shine!

Kimchi Recipe (How to Make Kimchi)
Equipment
- large bowl
- Sauce pan
- Mason jar or fermentation crock
- colander
Ingredients
FOR THE CABBAGE BRINE
- 2 quarts unchlorinated water filtered or bottled water
- 0.5 cup kosher salt or sea salt
- 1 head Napa cabbage about 3 pounds; 1.3kg
TO MAKE THE KIMCHI
- 1 carrot sliced into matchsticks
- 1 bunch scallions end trimmed, cut into ½ inch pieces
- 1 small daikon radish or turnip, peeled, sliced into matchsticks
- 0.5 cup Asian pear peeled, sliced into matchsticks
- 6 garlic cloves chopped
- 2 tablespoons fresh grated ginger
- 3 tablespoons glutinous rice flour
- 1 cup gochugaru Korean chili flakes
- 0.5 cup fish sauce
- 3 tablespoons salted shrimp minced, as an alternative use shrimp paste or dried shrimp
- 2 tablespoons miso paste red or white – optional
Instructions
BRINE THE CABBAGE
- Whisk together the unchlorinated cold water and sprinkle salt in a large bowl.
- Slice off the root end of the cabbage. Slice the cabbage into quarters and submerge them in the brine. Use a plate or other small weights to keep the cabbage completely submerged.
- Set aside for 8-12 hours at room temperature.
- Set the cabbage into a colander and drain the brine. Rinse the cabbage and squeeze out excess water using your hands. Chop the cabbage into 1 inch pieces (if desired, or leave the pieces whole).
MAKE THE KIMCHI
- Add the cabbage to a large bowl along with the carrot, scallions, radish or turnip, Asian pear, garlic and ginger. Toss to combine.
- Add the rice flour and 1 cup water to a sauce pan. Heat to a simmer, then whisk for 3-4 minutes until smooth and the mixture forms a smooth, loose paste.
- Remove from heat and stir in the gochugaru. The chili flakes will bloom as the mixture cools.
- Stir in the fish sauce, salted shrimp, and miso paste (or your other umami alternatives).
- Pour the mixture into the cabbage and vegetables. With your hands, rub the gochugaru mixture into the vegetables, covering them as completely as possible.
- Taste and adjust for salt or any other desired seasonings.
- Pack the kimchi into a large mason jar (or several). Press the contents down and weigh it down with glass fermentation weights.
- Cover with a fermentation airlock lid, or use fermentation membranes.
- Set aside away from any sunlit areas and ferment for 1-3 days at room temperature.
- Set into the refrigerator and let sit for 1 week to let the flavors mingle.
- Use as desired.


Leave a Reply