
Introduction to Campfire Chili Pockets
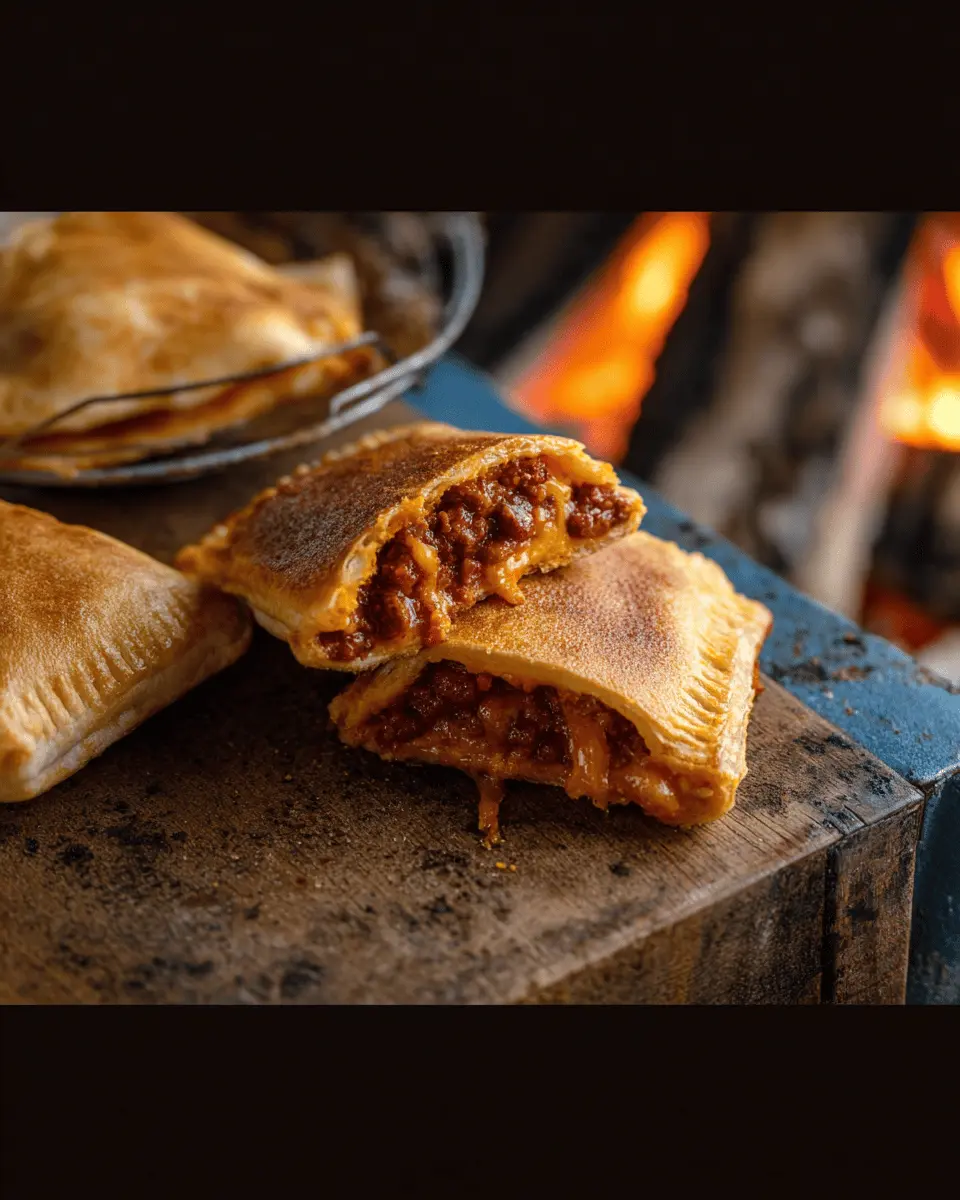
Are you a young professional seeking quick, delicious meals during your busy weekends? Look no further than Campfire Chili Pockets! These delightful pocket sandwiches fuse hearty flavors with an outdoor cooking experience, making them a perfect treat for adventurous souls. Imagine gathering around a crackling fire, sharing stories with friends, while biting into warm bread enveloping rich HORMEL® Chili With Beans and gooey cheese. It’s not just food; it’s an experience!
These chili-filled pockets can be made in just 15 minutes, fitting seamlessly into a busy lifestyle. Whether you’re camping for the weekend or enjoying a backyard barbecue, they offer a quick yet satisfying option that doesn’t sacrifice flavor. Plus, their portability means you can take them on hikes or picnics, providing that much-needed energy boost.
For those navigating the hustle of young professional life, meals like Campfire Chili Pockets serve a dual purpose: they’re not just about nourishment; they foster camaraderie, laughter, and connection. Want easy-to-follow recipes and ideas for your next outdoor adventure? Check out sites like Bon Appétit or Outdoor Cooking for inspiration. So, gather your ingredients and get ready for a pocket of joy around the fire!
Ingredients for Campfire Chili Pockets
Essential ingredients for a delicious pocket
To create scrumptious Campfire Chili Pockets, you’ll need just a few simple ingredients that pack a flavorful punch. Here’s what you’ll need:
- 4 teaspoons butter: This will give your pockets a rich, golden finish.
- 8 slices of bread: Choose your favorite type; whole grain or sourdough work wonderfully.
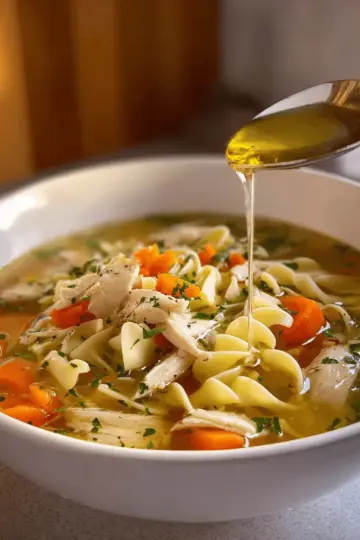
- 1 (15-ounce) can of HORMEL® Chili With Beans: For the heart of your dish, rich and hearty chili adds both protein and taste.
- 1 cup shredded cheese: Cheddar is a classic pick, but feel free to mix it up with pepper jack for extra kick!
Alternative ingredients to consider
Want to switch things up? Here are some alternative ingredients that can enhance your Campfire Chili Pockets:
- Different proteins: Swap in Turkey Bacon or Chicken Ham for a unique flavor profile.
- Vegetarian option: Replace the chili with roasted veggies and some spicy salsa for a meat-free treat.
- Add spices: Consider sprinkling in cumin or chili powder for an extra layer of flavor.
For more creativity, check out resources like Spice Up Your Life for interesting alternatives. The sky's the limit with your campfire creations!
Preparing Campfire Chili Pockets
When it comes to outdoor cooking, nothing quite beats the joy of preparing Campfire Chili Pockets. These tasty treats are not only delicious but are also an engaging way to bring friends and family together by the fire. Let’s break down the preparation process into easy steps, ensuring you have an unforgettable camping experience.
Gather Your Tools and Ingredients
Before you dive into the magic of cooking, you'll want to make sure you have everything on hand. Here's what you'll need:
-
Tools:
-
Sandwich iron (also known as a pie iron)
-
Campfire or grill setup
-
Spatula (optional, but helpful)
-
Ingredients:
-
4 teaspoons butter, divided
-
8 slices bread (try whole grain or your favorite kind)
-
1 (15-ounce) can HORMEL® Chili With Beans
-
1 cup shredded cheese (choose a melty variety like cheddar or jack)
Once you’ve gathered everything, it’s time to set the stage for those delicious Campfire Chili Pockets.
Grease the Sandwich Iron and Set Up Your Campfire
Start by greasing both sides of the sandwich iron with 1 teaspoon of butter. This will help prevent those tasty pockets from sticking and ensure a perfect, crispy finish.
Next, prepare your campfire! If you're using a grill, it should be nice and hot. Make sure the flames aren’t too wild; a good bed of coals will distribute heat evenly, helping your chili pockets cook perfectly.
Assemble the Chili Pockets
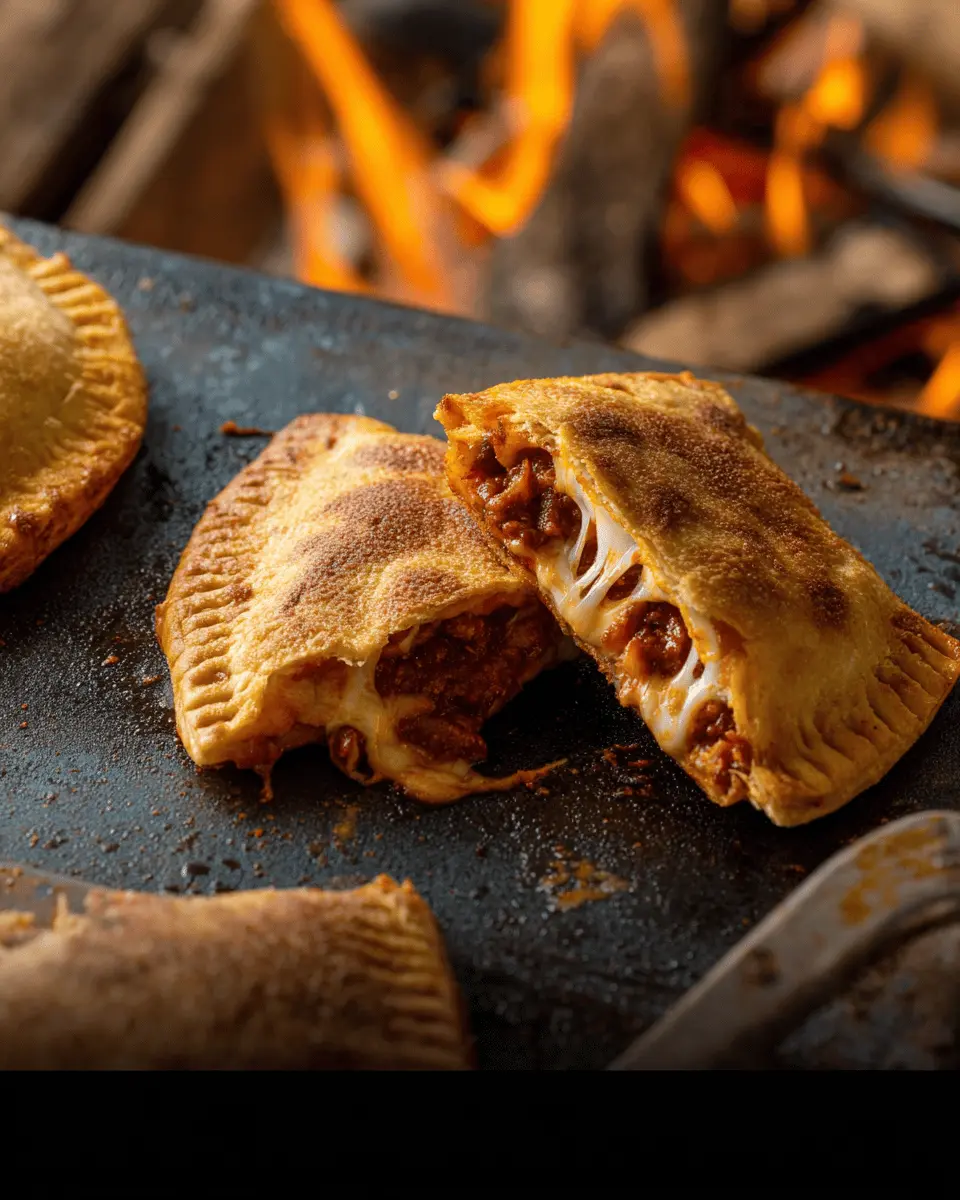
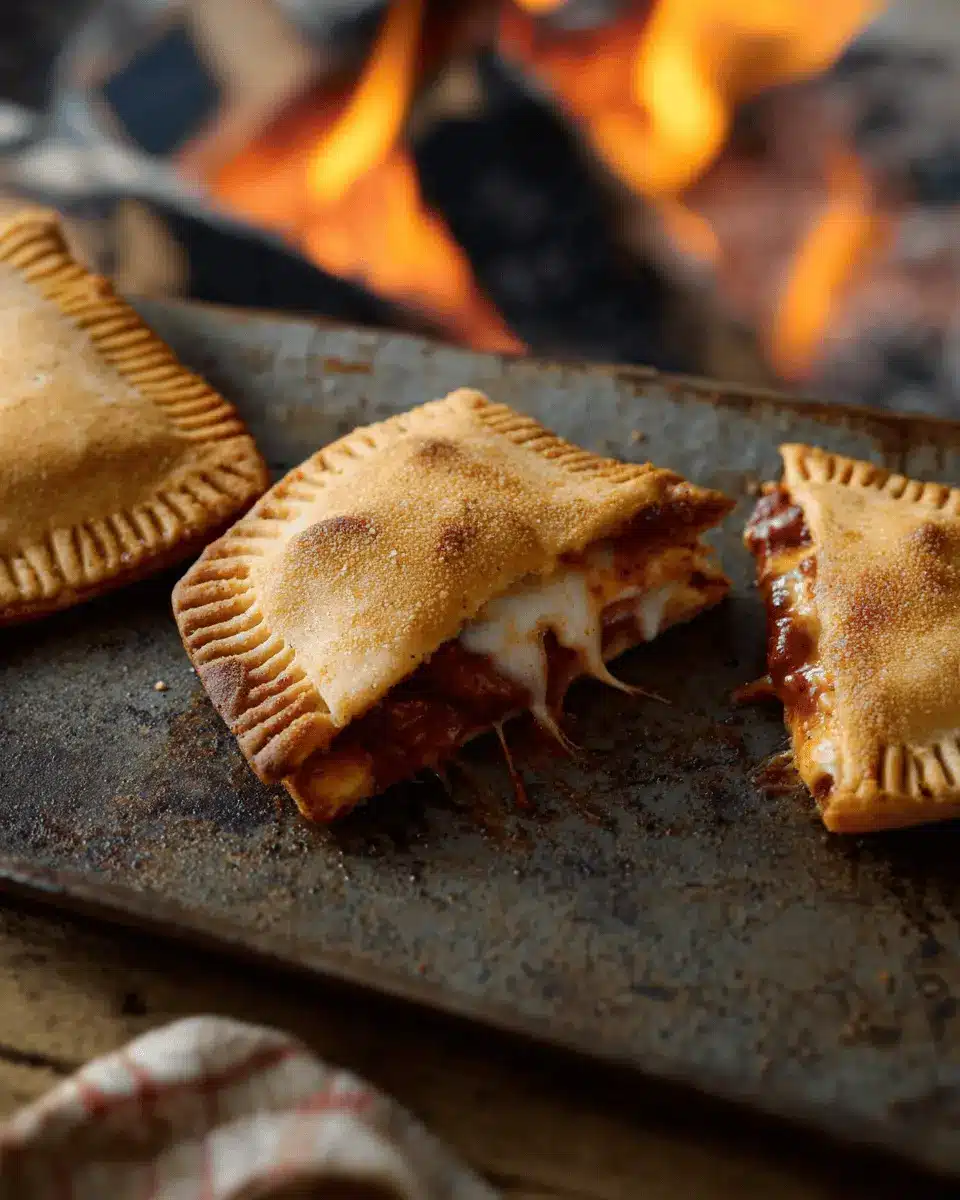
Now comes the fun part—assembly! Take one slice of bread and place it in the greased sandwich iron. Load it up with about 3 tablespoons of HORMEL® Chili With Beans and ¼ cup of shredded cheese, then top it off with another slice of bread. Close the iron securely; it may take a little practice to get a good seal, but that’s part of the adventure! Repeat this process for the remaining ingredients.
Cook Over the Flame
With your pockets ready, it’s time to cook! Place the sandwich iron over your campfire or grill. Let them cook for about 3 to 6 minutes, turning often to ensure they’re heated through and golden brown. You’ll know they’re done when they’re crispy and the cheese has melted beautifully. Keep an eye on them to avoid any unfortunate charred mishaps!
Enjoy Your Culinary Creation
Once your Campfire Chili Pockets are cooked to perfection, it’s time to dig in! Carefully open the sandwich iron (watch out for steam!), and take a moment to admire your handiwork before savouring that first bite. Don’t forget to share your delicious creation with friends; they’ll definitely want to know your secret!
Cooking outdoors can be a rewarding experience filled with amazing flavors and heartwarming moments. For more outdoor recipes and tips, check out resources like Outdoor Life or The Camping Family. Happy camping and cooking!
Variations on Campfire Chili Pockets
Vegetarian Campfire Chili Pockets
Looking for a meat-free option? Vegetarian campfire chili pockets are incredibly simple to whip up! Substitute HORMEL® Chili With Beans with their delicious vegetarian chili option. Load it up with your favorite veggies, like bell peppers or corn, and top with shredded cheese for that gooey goodness. You’ll still get that classic campfire experience, all while keeping it plant-based. For an extra flavor boost, consider adding spices like cumin or smoked paprika for a smokier profile.
Spicy Campfire Chili Pockets with Jalapeños
If you crave a kick, spicy campfire chili pockets with jalapeños is the way to go. Add a few slices of fresh or pickled jalapeños into your chili mixture for that zesty heat. You can also toss in some red pepper flakes or a splash of hot sauce to elevate the spice level. Pair these hot pockets with a cooling side like yogurt or sour cream to balance the heat and create the perfect outdoor meal. These variations keep your campfire experience exciting and flavorful!
For more campfire recipe ideas, check out The Outdoor Adventure for creative and hearty meals that are sure to impress!
Cooking Tips and Notes for Campfire Chili Pockets
Tips for Achieving the Perfect Toast
To get that golden-brown, crispy finish on your Campfire Chili Pockets, here are a few pointers:
- Use fresh bread: Stale bread won’t hold up well and may not toast evenly. Look for a good-quality loaf that’s soft but sturdy.
- Preheat the sandwich iron: This step is crucial! Warm it well over the fire to ensure even cooking.
- Butter generously: Spreading butter on both outer sides of the bread enhances flavor and promotes crispiness.
- Watch your heat: Maintain a steady, medium heat. Too hot, and you'll burn the bread before the filling is warm.
Notes on Using Leftovers
Got some chili left? No worries! Your Campfire Chili Pockets are the perfect way to reinvent leftovers.
- Creative fillings: Feel free to mix in veggies, cooked chicken ham, or even turkey bacon to make it even more exciting.
- Storage: Store leftover chili in an airtight container in the fridge for 3-4 days. You can use it for lunch the next day or for another round of pockets.
These tips will elevate your campfire experience and ensure each bite is delightful! For more on creative cooking with leftovers, check out this resource.
Serving Suggestions for Campfire Chili Pockets
Pair with Salads or Sides
To elevate your Campfire Chili Pockets, consider pairing them with a fresh salad or some tasty sides. A crisp garden salad with a tangy vinaigrette can offer a refreshing contrast to the robust flavors of the chili. Alternatively, crunchy tortilla chips or a light coleslaw can add texture and a delightful crunch. If you're feeling adventurous, try a side of grilled veggies or even a small bowl of guacamole to enhance the flavor profile!
Ideal Beverages to Complement Your Meal
When it comes to beverages, you have a plethora of options that pair beautifully with your Campfire Chili Pockets. Opt for a refreshing lemonade or sparkling water infused with fresh fruit—these choices can cleanse your palate. If you're in the mood for something warm, a cup of spicy ginger tea or a rich hot chocolate can complement the meal’s savory elements. Just think of your campfire experience as a picnic with family and friends, where these delicious drinks complete your cozy outdoor culinary journey!
Time Breakdown for Campfire Chili Pockets
Preparation Time
5 minutes
Get started by gathering all your ingredients and equipment. The quicker you prep, the sooner you can enjoy your delicious Campfire Chili Pockets!
Cooking Time
9 minutes
The cooking is where the magic happens! Once you’ve assembled your pockets, it only takes about 9 minutes over a hot campfire or grill to achieve that golden-brown perfection.
Total Time
14 minutes
In just 14 minutes, you can create a delightful and satisfying meal that’s perfect for sharing around the campfire with friends or family. Quick, easy, and thoroughly enjoyable!
For a detailed recipe, be sure to check out HORMEL® Chili With Beans for more inspiration. Why not try pairing your chili pockets with a refreshing drink like a sparkling lemonade? It complements the hearty flavors perfectly!
Nutritional Facts for Campfire Chili Pockets
Calories and Key Nutrients
One serving of Campfire Chili Pockets typically contains around 300 calories. Each pocket is packed with essential nutrients, offering approximately:
- Protein: 12g
- Total Fat: 15g
- Carbohydrates: 30g
- Fiber: 5g
These values can vary based on your ingredient choices, especially if you use a different brand of chili or cheese. For a nutritious twist, consider adding some veggies like bell peppers or onions!
Suggested Servings per Meal
This recipe delivers four delicious servings, making it perfect for a gathering around the campfire or a cozy family dinner. Pair these pockets with a simple side salad or some fresh fruit for a well-rounded meal. Need more ideas? Check out how to elevate your outdoor dining experience with light snacks and refreshing beverages!
When you share Campfire Chili Pockets with friends, you'll not only enjoy a delightful meal but also create memories filled with laughter and great company. Who doesn't love the aroma of melted cheese and chili under the stars?
FAQs about Campfire Chili Pockets
Can I make these pockets in a conventional oven?
Absolutely! While our Campfire Chili Pockets shine over an open flame, you can also make them in a conventional oven. Simply preheat your oven to 375°F (190°C), assemble your pockets as directed, and place them on a baking sheet. Bake for about 15-20 minutes, or until golden brown. It’s a great alternative if you’re craving this comfort food but can’t get outdoors.
What other fillings can I use for these pockets?
The beauty of Campfire Chili Pockets lies in their versatility! Consider experimenting with other fillings like turkey bacon, chicken ham, or even roasted vegetables. For a vegetarian option, try swapping in black beans and diced peppers. The possibilities are endless, and you can tailor each pocket to suit your taste or dietary needs Learn more about creative fillings here.
How do I store leftovers?
If you happen to have any leftover pockets (which is rare!), allow them to cool before storing. Place them in an airtight container in the fridge, and they should stay fresh for up to three days. Reheat them in the oven or on a grill for a delicious snack later on!
Conclusion on Campfire Chili Pockets
In summary, Campfire Chili Pockets offer a delightful mix of flavor and fun, making them perfect for your next outdoor adventure. In just 15 minutes, you can create a portable meal that combines savory chili and gooey cheese—ideal for sharing around the campfire. Remember to experiment with your favorite toppings, and enjoy!
For more camping recipes, check out HORMEL® Chili Recipes.

Campfire Chili Pockets: Easy Turkey Bacon Delight for Outdoor Fun
Equipment
- sandwich iron
Ingredients
Chili and Cheese Filling
- 4 teaspoons butter divided
- 8 slices bread
- 1 15-ounce can HORMEL® Chili With Beans divided
- 1 cup shredded cheese divided
Instructions
Cooking Instructions
- Grease warmed sandwich iron with 1 teaspoon butter.
- Place 1 slice bread in greased sandwich iron. Top with 3 tablespoons chili, ¼ cup cheese and another slice bread. Close iron.
- Cook over hot campfire or grill 3 to 6 minutes, turning often, or until hot and golden brown. Repeat with remaining ingredients to make 4 pockets.


Leave a Reply